Unpacking binary data from MQTT in Javascript

While doing trawl of Stackoverflow for questions I might be able to help out with I came across this interesting looking question:

Receive binary with paho mqttws31.js

The question was how to unpack binary MQTT payloads into double precision floating point numbers in javascript when using the Paho MQTT over WebSockets client.

Normally I would just send floating point numbers as strings and parse them on the receiving end, but sending them as raw binary means much smaller messages, so I thought I’d see if I could help to find a solution.

A little bit of Googling turned up this link to the Javascript typed arrays which looked like it probably be in the right direction. At that point I got called away to look at something else so I stuck a quick answer in with a link and the following code snippet.

function onMessageArrived(message) {
  var payload = message.payloadByte()
  var doubleView = new Float64Array(payload);
  var number = doubleView[0];
  console.log(number);
}

Towards the end of the day I managed to have a look back and there was a comment from the original poster saying that the sample didn’t work. At that point I decided to write a simple little testcase.

First up quick little Java app to generate the messages.

import java.nio.ByteBuffer;
import org.eclipse.paho.client.mqttv3.MqttClient;
import org.eclipse.paho.client.mqttv3.MqttException;
import org.eclipse.paho.client.mqttv3.MqttMessage;

public class MessageSource {

  public static void main(String[] args) {
    try {
      MqttClient client = new MqttClient("tcp://localhost:1883", "doubleSource");
      client.connect();

      MqttMessage message = new MqttMessage();
      ByteBuffer buffer = ByteBuffer.allocate(8);
      buffer.putDouble(Math.PI);
      System.err.println(buffer.position() + "/" + buffer.limit());
      message.setPayload(buffer.array());
      client.publish("doubles", message);
      try {
        Thread.sleep(1000);
      } catch (InterruptedException e) {
        // TODO Auto-generated catch block
        e.printStackTrace();
      }
      client.disconnect();
    } catch (MqttException e) {
      // TODO Auto-generated catch block
      e.printStackTrace();
    }
  }
}

It turns out that using typed arrays is a little more complicated and requires a bit of work to populate the data structures properly. First you need to create an ArrayBuffer of the right size, then wrap it in a Uint8Array in order to populate it, before changing to the Float64Array. After a little bit of playing around I got to this:

function onMessageArrived(message) {
  var payload = message.payloadBytes
  var length = payload.length;
  var buffer = new ArrayBuffer(length);
  uint = new Uint8Array(buffer);
  for (var i=0; i<length; i++) {
	  uint[i] = payload[i];
  }
  var doubleView = new Float64Array(uint.buffer);
  var number = doubleView[0];
  console.log("onMessageArrived:"+number);
};

But this was returning 3.207375630676366e-192 instead of Pi. A little more head scratching and the idea of checking the byte order kicked in:

function onMessageArrived(message) {
  var payload = message.payloadBytes
  var length = payload.length;
  var buffer = new ArrayBuffer(length);
  uint = new Uint8Array(buffer);
  for (var i=0; i<length; i++) {
	  uint[(length-1)-i] = payload[i];
  }
  var doubleView = new Float64Array(uint.buffer);
  var number = doubleView[0];
  console.log("onMessageArrived:"+number);
};

This now gave an answer of 3.141592653589793 which looked a lot better. I still think there may be a cleaner way to do with using a DataView object, but that’s enough for a Friday night.

EDIT:

Got up this morning having slept on it and came up with this:

function onMessageArrived(message) {
  var payload = message.payloadBytes
  var length = payload.length;
  var buffer = new ArrayBuffer(length);
  uint = new Uint8Array(buffer);
  for (var i=0; i<length; i++) {
	  uint[i] = payload[i];
  }
  var dataView = new DataView(uint.buffer);
  for (var i=0; i<length/8; i++) {
      console.log(dataView.getFloat64((i*8), false));
  }
};

This better fits the original question in that it will decode an arbitrary length array of doubles and since we know that Java is big endian, we can set the little endian flag to false to get the right conversion without having to re-order the array as we copy it into the buffer (which I’m pretty sure wouldn’t have worked for more than one value).

developerWorks Days Zurich 2012

This week I had a day out of the office to go to Zurich to talk at this years IBM developerWorks Days. I had 2 sessions back to back in the mobile stream, the first an introduction to Android Development and the second on MQTT.

The slots were only 35mins long (well 45mins, but we had to leave 5 mins on each end to let people move round) so there was a limit to how much detail I could go into. With this in mind I decided the best way to give people a introduction to Android Development in that amount of time was to quickly walk through writing reasonably simple application. The application had to be at least somewhat practical, but also very simple so after a little bit of thinking about I settled on an app to download the latest image from the web comic XKCD. There are a number apps on Google Play that already do this (and a lot better) but it does show a little Activity GUI design. I got through about 95% of the app live on stage and only had to copy & paste the details for the onPostExecute method to clear the progress dialog and update the image in the last minute to get it to the point I could run it in the emulator.

Here are the slides for this session

And here is the Eclipse project for the Application I created live on stage:
http://www.hardill.me.uk/XKCD-demo-android-app.zip

The MQTT pitch was a little easier to set up, there is loads of great content on MQTT.org to use as a source and of course I remembered to include the section on the MQTT enabled mouse traps and twittering ferries from Andy Stanford-Clark.

Here are the slides for the MQTT session:

For the Demo I used the Javascript d3 topic tree viewer I blogged about last week and my Raspberry Pi running a Mosquitto broker and a little script to publish the core temperature, load and uptime values. The broker was also bridged to my home broker to show the feed from my weather centre and some other sensors.

Man vs Horse

Today I did something a little different, instead of going to the local park to run 5km at Parkrun I set off to the New Forest to take part in a little event that Helen Bowyer had put together. The plan was to run 15km across the New Forest broken up in to 3 5km between pubs in a race against Helen on her horse Muttley. There where 7 runners from the ETS team, Me, James, Luke, Graham, Joe, Dominic and Peter also Rob on his road bike.

The runners and the Helen would be taking the same route with the runners getting a 10min head start on each leg. Rob had a route that was about twice as long and set off at the same time as Helen.

Leg 1

From The Rock at Canada Common to The Lamb at Nomansland. We set off across Canada Common from the back gate of The Rock, reasonably early on myself, James and Luke hit the front. Luckily Luke had run the route for this leg before so we didn’t have to do any looking at the map and managed to make our way to the Dealze Wood easily enough. We could probably have cut the corner a bit at the end and shaved some more time off. We had about a 5 min lead on Rob and another 3 over Helen (though she did have to detour a little to point Peter in the right direction).


View Leg 1 in a larger map

Leg 2

From The Lamb to The Royal Oak at Fritham. This was the shortest leg, but after a short climb through Bramshaw Wood it was across the open plain. The good view meant that Helen could see us and helped by the soft ground meant Muttley could go faster and caught us up with about 800m to go. Rob arrived pretty much at the same time as well.


View Leg 2 in a larger map

Leg 3

From The Royal Oak to The High Corner Inn. Jame, Luke and me hit the front again setting off, but the fact I’ve not been doing much more than 5ks recently really started to bite. I managed to stick with them both for the first half until we crossed the stream then we started to spread out. The spread ended up big enough that I lost site of Luke and James was long gone. I had a small nav failure at the bottom of the last climb up to the High Corner Inn, I think it was just my subconscious not wanting to climb, as I went past by about 400m and had to turn round and come back. Rob was first back this time.


View Leg 3 in a larger map

After we’ve finished we all went back to The Royal Oak for some lunch. It was a really good day out and I’m really up for having another go next year and maybe even have a look at the full marathon version at some point.

Even More MQTT enabled TVs

Kevin Modelling the headset

A project at work recently came up to do with using one of the Emotiv headsets to help out a former Italian IBMer who was suffering from locked in syndrome. The project was being led by Kevin Brown who was looking for ways to use the headset to drive things sending email and browsing the web but he was also looking for a way to interact with some other tech around the house. The TV was the first on the list.

Continuing on from my previous work with controlling TVs and video walls with MQTT I said I would have a crack at this. My earlier solution was limited to LG TVs with serial ports and this needed to work with any make so a different approach was needed. It also needed to run on Windows so it was also a chance to play with C# and .Net.

To be TV agnostic it was decided to use a USB IR remote from a company called RedRat. They make a number of solutions, but their RedRat III was perfect for what was needed.

RedRat IR transmitter & receiver

The RedRat API comes with bindings for C++, .Net on Windows (and a LIRC plugin for Linux). The RedRat III is not just a IR transmitter, it is also a receiver which means it can “learn” from existing remote controls so it can be used with any TV.

Kevin is using Emotiv headset to drive Dasher as the input device. Dasher is a sort of keyboard replacement that allows the user to build up words using at a minimum a single input e.g. a single push button. As well as building words other actions can be added to the selector, Kevin added actions for browsing and also to control the TV. These actions publish MQTT messages to a topic with payloads like “volUp”, “chanDown” or “power”.

So now we had the inputs it was time to get round to writing the code to turn those messages into IR signals. There are 2 MQTT .NET libraries listed on the MQTT.org software page. I grabbed the first off the list MqttDotNet and got things working pretty quickly.

The following few lines sets up a connection and subscribes to a topic.

String connectionString = "tcp://" + 
  Properties.Settings.Default.host.Trim() + ":" +
  Properties.Settings.Default.port;
IMqtt client = MqttClientFactory.CreateClient(connectionString, "mqtt2ir");
try
{
	client.Connect(true);
	client.PublishArrived += new PublishArrivedDelegate(onMessage);
	client.ConnectionLost += new ConnectionDelegate(connectionLost);
	client.Subscribe(Properties.Settings.Default.topic.Trim(), 
	  QoS.BestEfforts);
}

Where the onMessage callback looks like this:

bool onMessage(object sender, PublishArrivedArgs msg)
{
	String command = msg.Payload.ToString().Trim();
	IRPacket packet = loadSignal(command);
	if (packet != null) 
	{
		redrat.OutputModulatedSignal(packet);
	}
	return true;
}

MQTT2IR Settings Window

And that is pretty much the meat of the whole application, the rest was just some code to initialise the RedRat and to turn it into a System Tray application with a window for entering the broker details and training the commands.

Unfortunately just a few days before we were due to have delivered this project we learned that the intended recipient had picked up a respiratory infection and had passed away. I would like to extend my thoughts to their family and I hope we can find somebody who may find this work useful in the future.

BBC looking at mind control

Katia Moskvitch from the BBC has just published a nice article on using the mind to control technology.

As part of the article as well as trying out the Emotive headset* she interviewed Ed Jellard and Kevin Brown from the IBM ETS team based in Hursley.

* This is the same headset used for the Bang Goes The Theory Taxi racing.

MQTT powered video wall

Scaling things up a little from my first eightbar post.

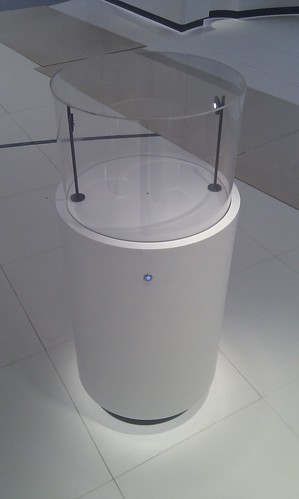
This was one of those projects that just sort of “turned up”. About 3 weeks ago one of the managers for the ETS department in Hursley got a call from the team building the new IBM Forum in IBM South Bank. IBM Forums are locations where IBM can showcase technologies and solutions for customers. The team were looking for a way to control a video wall and a projector to make them show specific videos on request. The requests will come from pedestals known as “provokers”, each having a perspex dome holding a thought-provoking item. The initial suggestions had been incredibility expensive and we were asked if we could come up with a solution.

Provoker

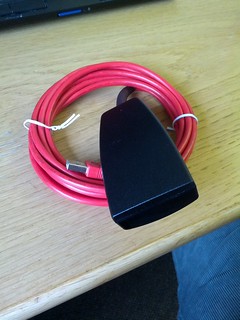
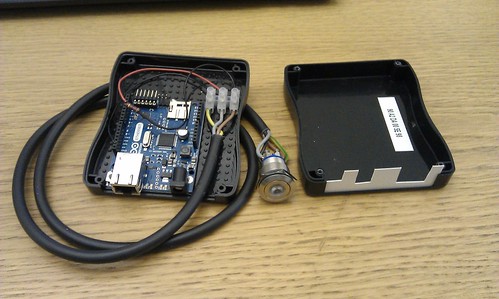
The provokers have access to power and an Ethernet connection. Taking all that into account a few ideas came to mind but the best seamed to be an Arduino board with Ethernet support and a button/sensor to trigger the video. There is a relatively new arduino board available that has a built in Ethernet shield which seemed perfect for this project. Also, since a number of the items in the provokers would be related to IBM’s Smarter Planet initiative, it made sense to use MQTT as a messaging layer as this has been used to implement a number of solutions in this space.

Nick O’Leary was enlisted to put together the hardware and also the sketch for the Arduino as he had already written a MQTT client for Arduino in the past.

Each provoker will publish a message containing a playload of “play” to a topic like

provoker/{n}/action

Where ‘{n}’ is the unique number identifying which of the 6 provokers sent the message.

To provide some feedback to the guest that pressed the button, the LED has been made to pulse while one of the provoker-specific videos is playing. This is controlled by each provoker subscribing to the following topic

provoker/{n}/ack

Sending “play” to this topic causes the LED pluse, sending “stop” turns the LED solid again.

The video wall will be driven by software called Scala InfoChannel which has a scripting interface supporting (among other things) Python. So a short script to subscribe to the ‘action’ topics and to publish on on the ‘ack’ got the videos changing on demand.

And sat in the middle is an instance of the Really Small Message Broker to tie everything together.

Arduino in a box

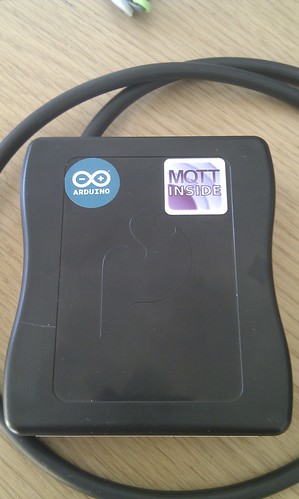
This was also the perfect place to use some of my new “MQTT Inside” stickers.

First sticker deployed

This project only used one of the digital channels (for the button) and one of the analogue channels (for the LED) available on the Arduino – which leaves a lot of room for expansion for these type of devices. I can see them being used for future projects.

Parts list

  1. Arduino Ethernet
  2. Blue LED Illuminated Button
  3. A single resistor to protect the LED
  4. 9v power supply
  5. Sparkfun Case

Parrot AR.Drone

Andy Piper brought his new toy to the lab today. While on a whistle stop tour of China recently he called in at Hong Kong on the way back, where he picked up one of the a Parrot AR.Drones which have been released this month.

The AR.Drone is a quadricopter with 2 video cameras, one mounted in the nose and one downward-facing. The drone that acts as an ad-hock Wi-Fi access point allowing it to be controlled from any device with Wi-Fi. At the moment Parrot are only shipping a client for the iPhone, but there is an API available and there is already footage on the net using an Android Nexus One to control one. It’s loaded with a bunch of other sensors as well, an accelerometer to help keep it stable and a ultrasound altimeter to help it maintain altitude over changing ground.

The iPhone interface for flying the drone uses the accelerometer and is a bit tricky to start with, but I think with a little bit of practice it shouldn’t take too long to get the hang of it. The feed from the video cameras is fed back to the handset allowing you to get a pilot’s eye view. At the moment none of the software allows you to capture this video, but it’s expected to be added soon. You can also use the camera to play AR games or have the it hover and hold station over markers on the floor.

The whole thing runs a embedded Linux build on a ARM chip and you can even telnet into the thing. It comes with 2 chassis, one for outside and one with some protective shrouds for the propellers to use indoors. 

I think some very cool stuff should be possible with a platform like this.

Here are 2 short videos I short of a few of us having a go with it on the lawn in front of Hursley House.