Mad thermostat plan

Something I’ve really wanted to have a go at for a long time is hacking together a smarter heating system. The long process of moving house prevented any progress until now but I think a few things fell in to place today to get the project off the ground. And so a slightly mad thermostat plan was hatched…

The first part of the puzzle is a side effect of getting a solar water panel; to make the most of the solar panel we should only be using the boiler to top up the hot water at the end of the day. (Obviously that’s just theoretical at the moment because its pretty much been raining non stop since we got the solar panel!) Unfortunately the current central heating controller will only turn on the heating if the hot water is on at the same time, which is no help at all, so we really need a new controller to make the most of our zero carbon supply of hot water. There’s another, purely aesthetic reason to want a new heating controller; the kitchen upgrade got under way this week and the old controller has seen better days.

The current kitchen destruction has a bigger part to play though; now is an ideal opportunity to hide cables behind the new cupboards. For a while that didn’t actually seem like it was going to be all that much help, based on where the old thermostat was (hidden behind a door in the living room). I was looking at various programmable thermostats but the existing wiring from the thermostat restricted the options somewhat. The programmable thermostat we had in the old house seemed to work quite well with the existing wiring and controller… as long as the battery was fresh, otherwise it got confused about the temperature. Obviously not ideal for a thermostat, so I was hoping to avoid batteries this time!

Then, while being distracted by the wonky light switches yet again, inspiration struck…

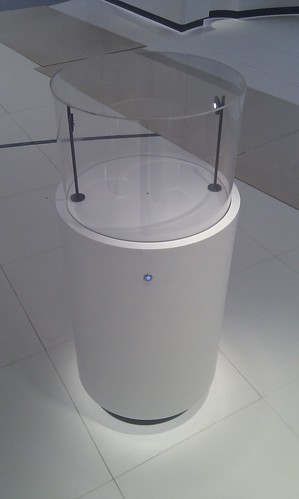
The house hasn’t been constructed with the greatest care in the world, but those switches just could not have been original. The only thing that makes sense is if they were another botched DIY job, and it seemed highly unlikely that anyone would have dropped another cable run down the wall to do it. My hunch, based on the fact that there’s a water cylinder directly above those switches, is that there’s a horizontal cable run between the two. I checked, and… eureka! So now it’s a simple job to put both switches back on the same box, leaving an empty recessed box with a now bare kitchen wall behind it, making it perfect to run a new thermostat cable through the back of the box and round to the boiler! (Well I was pretty excited by this plan at the time.)

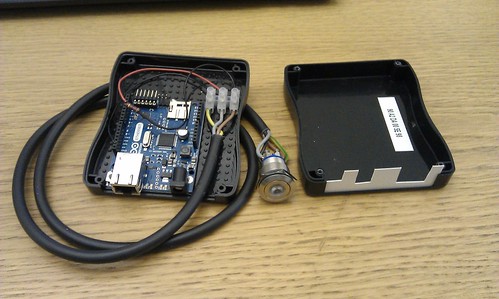
The thermostat to finish off this puzzle is a Heatmiser combined programmable thermostat and hot water timer. My theory is that I need the PRT/HW-N thermostat to go in the living room and a PRC powered relay card in place of the old central heating controller. I’m almost certain that the wiring will work with the existing system anyway, but if anyone has any experience/tips/gotchas, please let me know! That programmable thermostat should give me an RS485 interface to the thermostat which, if all goes well, won’t be too difficult to connect to my nanode- either with a bit of soldering, or one of these IO shields if I’m feeling lazy! The thing I like about this arrangement is that it should be possible to achieve plenty of automation if all goes well but, if there are any technical hitches, there’s a decent off the shelf controller to fall back on.

Update: a quick update since I’m doing some head scratching over whether the existing wiring from the central heating timer to the junction box in the airing cupboard will allow the heating to run independently from the hot water. If it does, the new thermostat is in place ready to go…

If it doesn’t, the new thermostat will just be a decorative feature while I figure out where I can sneak a new cable upstairs without disturbing the new kitchen! I don’t want to break the heating until I’m sure everything will work, so I’m working off a photo for now…

I’d love to hear from anyone who can decipher that lovely nest of wires! Here’s my theroy so far:

The black cable is the valve, and the other two cables that enter with it at the bottom are the pump and cylinder stat. It looks to me like the grey cable should be to turn the hot water off, which seems to be connected to the cylinder stat and a red wire from one of the cables above, which I’m hoping is from the timer. That just seems too easy for this house though, and I’m a bit puzzled by what the connections on the orange wire actually are. Lucky it’s all neatly connected and labelled so I can check the orange wire is connected to the cylinder stat and pump… bother. I guess I’m going to have to wait until Jo’s not looking so I can investigate more thoroughly!


Homecamp 4

DC power, electricity monitoring, gas monitoring, data gathering, solar panels, hardware hacking, software hacking, behaviour change, open source, home energy, energy visualisations, cows…

Just some of the things we talked about this weekend at Homecamp 4 at the Centre for Creative Collaboration near King’s Cross in London.

A two-day event this year, Homecamp 4 (thanks to organiser Ken Boak) brought together hardware hackers, software hackers, home automation fans, energy and sustainability people, designers, and loads of enthusiasm and energy for sharing skills and experiences. And, thanks to the generous sponsorship by Amee and the support of Manager Debbie Davies at C4CC, we had lovely breakfasts, lunches, and Saturday evening drinks.

C4CC

Saturday morning was dedicated to a series of presentations that had been scheduled in advance. It kicked off with a fascinating presentation by Simon Daniel from Moixa (inventor of the Palm folding keyboard and the USB rechargeable batteries) about how we could, and should, power all our lighting and computing at home off a couple of solar panels. By storing the solar power in batteries and then using it as DC power, rather than converting it to AC power, we’d not only avoid unsightly power bricks on everything, but we’d double the efficiency of the solar energy over converting it to the usual AC power to match our ordinary home electricity circuits and then convert it back to DC for consumption by LED lighting, laptops, mobile phones, and the like.

Simon from Moixa

Another interesting point he made was that most young people either don’t own their own homes or they’re not likely to stay in their current house for the next 15 years so they’re unlikely to invest in solar panels. So the company is working out a way to produce essentially portable solar panel, battery, and control packages that could be installed (and transported when you move house) as easily as Sky.

Next up was James Smith from Amee to demo what you can do with the Amee API. Amee collect data about energy consumption and carbon emissions, most of which is publicly available but usually not in a form that’s easy to consume. A team of scientists search out data from all over the world about the carbon emissions of anything you can think of. The team reviews the data, corrects any errors they find, and then turns the data into code. Developers can then write applications that use the data through the Amee API.

James from Amee

James and Chris Adams, also from Amee, demo’d how to use one of the toolkits that Amee provides to developers to show how quick it is to generate a web form that calculates the carbon emissions of cows from ‘enteric fermentation’ (burping and farting, to you and me). His favourite Amee hack, though, was to display the carbon emissions of setting fire to things in Minecraft.

After a brief pitch by Casper Koomen from Amsterdam about Pachube, and an update from organiser Ken on his Nanode (previously seen, discussed, and built at Oggcamp 11!), Trystan Lea and Glyn Hudson (from North Wales) described and demo’d their neat open source, Arduino-based energy monitoring project, the OpenEnergyMonitor (first presented at Homecamp 2).

After a novel but tasty free lunch of Vietnamese baguettes, the afternoon proceeded in a more unconference-style format. In a mix of formal presentations and informal discussions, we had talks on a range of topics, including getting your hardware ideas produced commercially, home energy monitoring experiences and visualisations, home-grown wind turbines, 3D printing, and I gave a short introduction/overview on the psychology of energy behaviour change. Most talks got several questions and I was really pleased that my talk, despite having a fairly different focus from many of the others, generated quite a lot of interest and discussion both at the time and over the rest of the weekend.

Evidence I was there!

The Saturday evening pub was unfortunately closed for a private party so Tony and I encouraged everyone back to the lovely Harrison Bar where we were staying and had already eaten a good dinner and noticed an interesting list of beers. If you like ginger beer, I recommend the Crabbie’s Ginger Beer (4%).

Sunday took on a more hackday feel and the attendees either hacked on Nanodes and similar hardware, played with software APIs, or wandered/sat around discussing cool ideas.

Hacking

In all it was a very fun weekend. We had some great conversations and met some very cool people. Hopefully, there’ll be a Homecamp 5.

Conversing

During the weekend, Tony and I, ever on the lookout for interesting content for the Ubuntu-UK Podcast, interviewed James about Amee, and Tristan and Glynn about their OpenEnergyMonitor project. Look out for them in upcoming episodes of UUPC.

Photos thanks to Tony Whitmore

MQTT powered video wall

Scaling things up a little from my first eightbar post.

This was one of those projects that just sort of “turned up”. About 3 weeks ago one of the managers for the ETS department in Hursley got a call from the team building the new IBM Forum in IBM South Bank. IBM Forums are locations where IBM can showcase technologies and solutions for customers. The team were looking for a way to control a video wall and a projector to make them show specific videos on request. The requests will come from pedestals known as “provokers”, each having a perspex dome holding a thought-provoking item. The initial suggestions had been incredibility expensive and we were asked if we could come up with a solution.

Provoker

The provokers have access to power and an Ethernet connection. Taking all that into account a few ideas came to mind but the best seamed to be an Arduino board with Ethernet support and a button/sensor to trigger the video. There is a relatively new arduino board available that has a built in Ethernet shield which seemed perfect for this project. Also, since a number of the items in the provokers would be related to IBM’s Smarter Planet initiative, it made sense to use MQTT as a messaging layer as this has been used to implement a number of solutions in this space.

Nick O’Leary was enlisted to put together the hardware and also the sketch for the Arduino as he had already written a MQTT client for Arduino in the past.

Each provoker will publish a message containing a playload of “play” to a topic like

provoker/{n}/action

Where ‘{n}’ is the unique number identifying which of the 6 provokers sent the message.

To provide some feedback to the guest that pressed the button, the LED has been made to pulse while one of the provoker-specific videos is playing. This is controlled by each provoker subscribing to the following topic

provoker/{n}/ack

Sending “play” to this topic causes the LED pluse, sending “stop” turns the LED solid again.

The video wall will be driven by software called Scala InfoChannel which has a scripting interface supporting (among other things) Python. So a short script to subscribe to the ‘action’ topics and to publish on on the ‘ack’ got the videos changing on demand.

And sat in the middle is an instance of the Really Small Message Broker to tie everything together.

Arduino in a box

This was also the perfect place to use some of my new “MQTT Inside” stickers.

First sticker deployed

This project only used one of the digital channels (for the button) and one of the analogue channels (for the LED) available on the Arduino – which leaves a lot of room for expansion for these type of devices. I can see them being used for future projects.

Parts list

  1. Arduino Ethernet
  2. Blue LED Illuminated Button
  3. A single resistor to protect the LED
  4. 9v power supply
  5. Sparkfun Case

Bang went the theory…

As with yesterday’s post, I really don’t have to do too much work on this one, as the detail has already been written up elsewhere…

If you watched this week’s edition of Bang Goes The Theory on BBC1, you will have seen Nick O’Leary and Kevin Brown from IBM Hursley helping Jem and Dallas to drive taxis. That probably wouldn’t have been entirely revolutionary, had it not been done through a combination of an Emotiv brain-signal-reading headset, and some MQTT and Arduino funkiness… no hands on the wheel or feet on the pedals!

Nick has a great write-up of what sounds like a fun (but cold) event. You may still be able to catch the fun on iPlayer, or there are some clips over here.


(Image: Creative Commons Attribution Non-Commercial Share-Alike (2.0) from knolleary’s photostream, used with permission – full set)